
There’s no doubt that the 3×4 inch rectangular orbital sander has been a great innovation in the world of sanding, allowing for faster and more consistent sanding in applications that would otherwise be done by hand. It not only saves time while sanding hard to reach areas, such as inside corners or on curved surfaces where traditional disc sanders would fail, they also provide superior and consistent results. However, since this sander does not offer a random orbit pattern, without the correct technique and abrasives, it can be all-too easy to accidentally create sanding swirls which could lead to a blotchy finish. But, the good news is, there are some things that we can do to overcome swirls – once and for all. In this article we’ll cover some common causes of swirls, what to do to prevent them and how to repair your surface if they do come up.
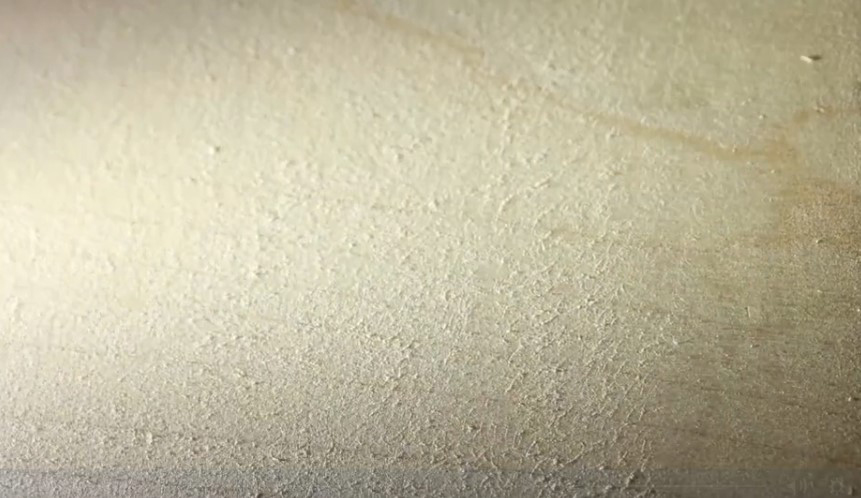
What is causing the swirls?
Of course the best way to overcome swirls is to avoid them completely by understanding what causes them and using proper sanding techniques and quality abrasives/accessories. The following are some of the most common reasons that we see for sanding swirls to show up from the 3×4 sander.
1.Sander: Sanding Pattern
Firstly, the 3×4 sander is not a random orbital sander. This means that the sander produces a repetitive sanding pattern, instead of a random one. Random orbital sanders do this automatically by having the backup pad rotate along multiple arbitrary paths simultaneously, covering its tracks naturally, however the 3×4 sander only moves back and forth along one trajectory, meaning the user must compensate in his technique and sanding pattern, otherwise you will be able to see where he sanded.
2. Sander: Vibration
In addition, because of the lack of a random orbit, the sander is essentially vibrating back and forth, potentially leading the sander to “skip” over the surface of the workpiece. This skipping will leave some of the surface sanded unevenly on its own, however if the user tries to overcompensate with pressure, the sanding swirls can come up in addition to the expected “wavy” surface.
3. Improper Technique: Too much or too little pressure
When you sand using too much pressure, the sander will not be able to move freely, thus causing it to sand unevenly. When you sand with too little pressure, some areas will not be sanded as much as others and you will not get the cut rate you are looking for – plus the possibility that swirls will occur due to the fact that you may be unintentionally lifting the sander up and down while sanding.
4. Improper Technique: Using the wrong sander speed (RPM)
Using the sander at the wrong RPM, or using an older sander that may be underperforming, can cause swirls – whether the sander is going too fast – causing skipping or going too slowly, causing you to compensate in other ways.
5. Poor Quality, Incorrect or Old Abrasives
Using low quality abrasives means you may have a problem with cut rate or grain shed. When your grains are dull, you may be inclined to press too hard to compensate – leading to swirls. Additionally, you may have grains that come loose on the workpiece, so you’re essentially sanding them into the surface.
How to Prevent Sanding Swirls with the 3×4 Orbital Sander
While it may seem like it’s harder to avoid swirls than create them, and you may be questioning at this point whether it’s worth it to use the sander in the first place, but I assure you, it is possible to learn the art of using this tool and create predictably good results in less time than hand sanding.
Technique
1. Know what causes swirls
Before you get too frustrated, learn the causes of swirls above. The first step to resolving any issue is to know what is causing it. If you find yourself with swirls, try to observe what you did and diagnose the cause. Once you know it, you can change it.
2. Speed: Keep the sander speed (RPMs) high, but don’t move too quickly around the surface
The Ekasand sanders offer an adjustable RPM, so it’s important to identify the correct speed for your application. While there is no one-size-fits-all speed setting, a good guideline is to keep the setting on a higher RPM, while moving at a conservative to moderate pace around the workpiece – giving the sander time to do its job, but not so much time that it over-sands any area. Sanding with high RPMS and a faster movement across the surface can lead to skipping and swirls, so as much as you may be tempted to get the job done faster, remember the old adage: “slow and steady wins the race” and mind your pace. To learn more about sander speeds, read this article.
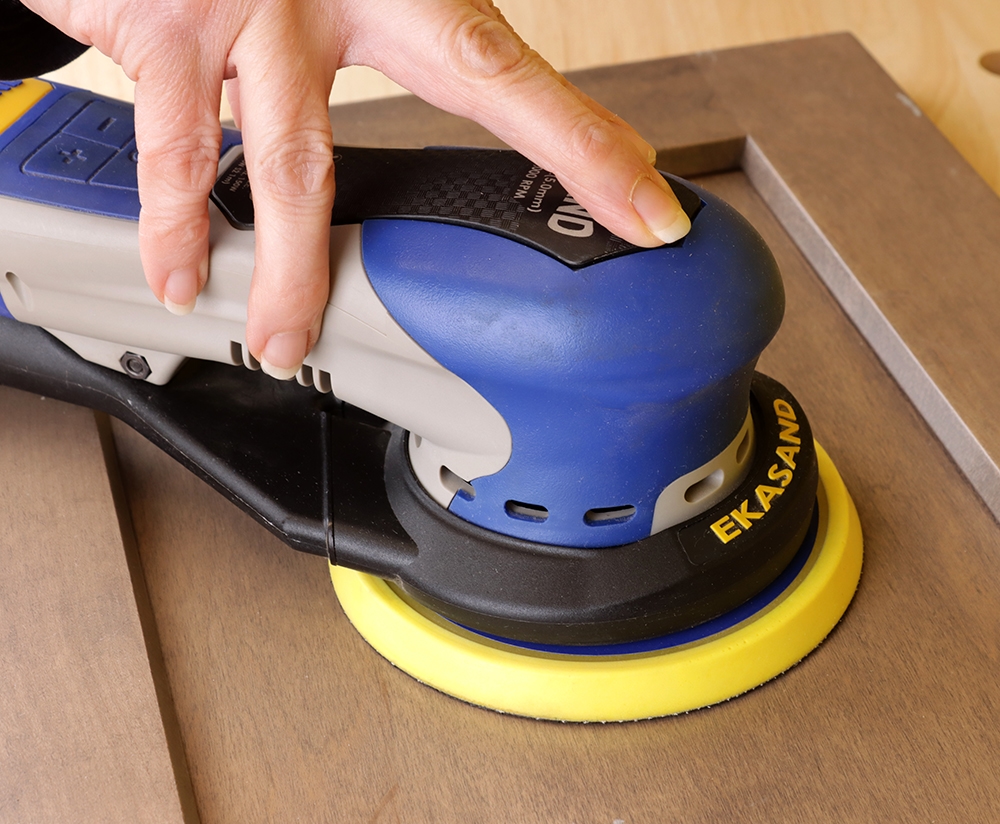 3. Pressure: Let the weight of the sander do the work
As mentioned above, sanding with the wrong pressure can lead to bad results: swirls and uneven surfaces. While it may seem difficult to find the “right” pressure – a bit of a “Goldilox” search – it’s actually pretty simple. The guideline is to let the weight of the sander do the work for you, meaning you don’t need to push it down or try to hold it up too high. Simply place your hand on the sander and let yourself feel as you are guiding the machine around the surface, rather than pressing it or resisting gravity. Note that for certain applications, such as with foam abrasives on contours, you may need to push down slightly, and other times not. It depends on the particular foam product and the particular project – just be aware of what you’re doing and if you are unsure, just test. It shouldn’t feel like you have to force the sander. While this may all seem a bit counterintuitive at first, with some practice, it’ll feel natural.
 4. Start On, Stop Off
One of the most important rules to follow when sanding is this: start on, stop off. This means that when you start the sander running, it is already on the work surface, and when you finish sanding, you turn the sander off in the air. When you turn the sander on before you put it on the surface, you are leaving too much margin for error in finding the correct placement (evenly flat) and pressure on the surface. When you turn the sander off, you may encounter extra vibrations or move the sander in an unexpected way, for example, which can lead to undesired results on the surface, however when the sander is still running at normal speed and you simply lift it straight up in the air to turn it off, you’ll just leave the surface finished, rather than creating an opportunity for error.
 5. Use a good sanding pattern
Following a good pattern means you will achieve a blended, consistent finish and you won’t see any undesired evidence of the sander. When you sand a flat surface in one direction, you may end up with visible rows where the sander was. To avoid this issue, sand the whole piece side to side, then again up and down across the whole surface. Following this process will help to “cover your tracks” to blend and make an even finish.
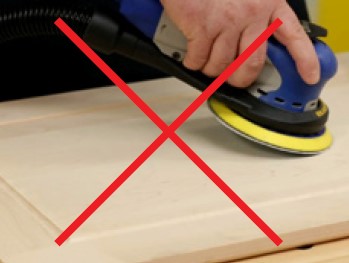
6. Sand Flat
Although it may sometimes be tempting to tilt the sander, avoid this and keep the sander flat. In addition to causing unsightly marks, tilting can cause you to literally sand a groove into your workpiece.
7. Practice, Practice, Practice
While aspects of abrasives and finishing are definitely a science, the practice of sanding effectively is definitely an art that requires practice. If you find you consistently get swirls with your 3×4 sander, review all of the technical elements above and practice on excess materials to get the hang of it. Don’t be discouraged – it will be worth the effort when you see the high quality results you get in your perfect finishes. If you’re using Uneeda products and you’re stuck, reach out to our support team to get some guidance.
Using the Proper Abrasives
Follow a proper grit sequence
Following a proper grit sequence means that you will maximize your cut rate and get the highest quality finish you can. While not necessarily directly related to preventing swirls, it is part of following proper technique to achieve great results. To learn more about sequencing, read this article or watch this video.
Use Hook & Loop instead of PSA
This tip is more relevant to disc sanders, as Uneeda’s 3×4 sanders are more common in hook and loop. Perhaps not an obvious issue, many people find that PSA sheets will produce more swirls than their hook & loop counterparts. This is because as the sander heats up during sanding, the PSA glue will also get warm. It then produces residue underneath the sheet that gets left behind and creates an uneven surface. The sandpaper is placed on an uneven surface and the sections that have leftover PSA will sand deeper. While it may be tempting to use PSA due to the price point, it may not be worth the potential sacrifice in sanding results.
Accessorize: Use a Pad Saver or Foam Interface Pad with conventional abrasives on flat surfaces
When sanding with conventional abrasive sheets such as our Filmtek sheets, using an accessory like the pad saver or interface pad between the abrasive and the backup pad will help to prevent swirls. A pad saver is essentially a material that has hook and loop on both sides and provides a buffer between the sander and the abrasive. The interface pad is similar, however it is thicker and has either hard-density or soft-density foam as the substrate. These products help because they will absorb some of the sander’s vibration. Less vibration means less opportunity for the “skipping” described earlier. Additionally, even with harder density foam, using any foam will cause the cut to be a bit softer than it would be without it, since the grain will slightly recede. Using the hard density pad is good for flat surfaces or applications like louver doors, in which you may need to offset the sheet a bit to reach a tight space. Using the soft-density pad will allow you to achieve a higher cut rate than a regular foam abrasive, like Ekasilk Plus, while matching contoured surfaces. This may be helpful in applications such as stripping or repairing deep knife marks or previous sanding defects, which would require more coarse grit than is possible in Ekasilk Plus. See this technique in action.
Use Foam Abrasives for Finishing Applications
When sanding in finishing applications, using foam abrasives offer an ideal solution – not just for avoiding swirls and getting speedy results, but also for achieving the great looking finish you are after and for a more affordable rate. This is because Ekasilk Plus sponges are foam-backed abrasives that already have hook and loop. This eliminates the need for accessories like backup pads and additional high-grit sheets. It’s all in one. The foam absorbs the vibration from the sander, while allowing for the softer cut you need between coats of finish. Plus, the foam will be more forgiving if your technique slips up and you accidentally use too much pressure or make another mistake.
Tips to Recover from Sanding Swirls from the 3×4 Sander
Got swirls? Don’t beat yourself up – it happens to the best and most experienced in the industry. Let’s see what you can do to recover your finish.
Sand it down!
Depending on the severity of your swirls and the nature of your workpiece, your best option may be to start your grit sequence again. Essentially, sand over the whole thing with a lower grit and then follow your sequence again. Make sure to review the surface between each time to check that you don’t have any new swirls and that the old ones are gone.
Note: lighting is KEY to see them – make sure to light the piece from the side to allow the swirls or other defects to cast shadows.
Mask swirls with Ekasilk Plus and/or Uneelon pads
If the swirls are not so bad, you may be able to “mask” them with Ekasilk Plus or Uneelon non-woven pads. Masking doesn’t necessarily remove the swirls completely, but it does cover them up enough that they won’t be visible in the finish. To learn more about these options check out the following: watch this sanding demo Using Uneelon to get rid of swirls (video) or this Hand Sanding 101 Webinar – skip to ~13:30 until ~24:00 for the relevant details.
Conclusion
As you can see, there are many causes for swirls, and many times, swirls can be avoided through common sense approaches – using good technique, the correct products/accessories and quality abrasives. However, no matter how good we are or how good the product is, sometimes swirls still happen. When they do, don’t fret – you can recover with the products and techniques above – such as using Uneelon pads to mask the marks or sanding through the grits again. If you have any questions about getting the best results from your 3×4 Ekasand sander or you’re interested in making the switch, contact an Uneeda rep today. To browse available sanders and products, visit our e-commerce store.


